Самое актуальное и обсуждаемое

Популярное

«хочете» или «хотите», как правильно?
Почему я не знаю чего я хочу
В 1953 году студентов Гарварда пригласили поучаствовать в социальном эксперименте....
53
0
0

10 аргументов, почему надо начать подготовку к егэ заранее
ТОП курсов от ведущих ВУЗов РФ
«Специалист» от МГТУ им.Баумана
Сайт — specialist.ru Стоимость обучения...
55
0
0

10 востребованных профессией, связанных с химией
Востребованные специальности
Студенты-химики на третьем курсе, а иногда и в самом начале обучения выбирают...
49
0
0

10 ошибок, которые мешают пройти отбор на стажировку
Ошибки, связанные с soft skills
Стажёрам важнее всего уметь работать в команде и быть готовыми быстро...
49
0
0
10 перспективных профессий, связанных с биологией
Специализации генетика
Вот основные узкие профили генетиков:
Детский генетик
лечит врожденные...
49
0
0

10 способов выяснить, чего ты хочешь от жизни
Что такое успех и как определить свои критерии успешности
Тот случай, когда трактовка термина полностью...
50
0
0
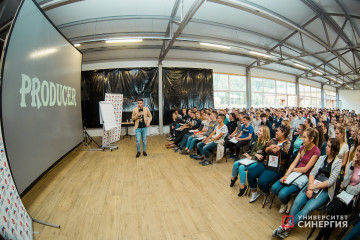
10 успешных российских кинопродюсеров
Специализации
Профессия «продюсер» имеет несколько специализаций:
Музыкальный продюсер. Занимается...
52
0
0

100 профессий будущего
Профессия аукциониста
Это специалист, который ведет торги. Аукцион считается успешным, если в результате...
49
0
0
Полезные советы

Важно знать!
12 самых высокооплачиваемых спортсменов мира
Горнолыжный спорт
Для того чтобы стать горнолыжником понадобятся не только отличная физическая подготовка, но и дорогостоящая экипировка. И если для выносливости и сильных мышц нужен гимнастический зал,...
Читать далее
13 действенных способов как обойти антиплагиат и 3 причины этого не делать
13 народных средств для восстановления памяти
15 необычных профессий прошлого, которым нет места в современном мире
15 приложений для изучения программирования с нуля
20 лучших дизайнеров интерьера россии и мира
20+ лучших курсов 3d-моделирования для начинающих дизайнеров и визуализаторов
20+ лучших курсов для инфопродюсеров: обучение от популярных онлайн-школ
2019-2020 учебный год
23 удивительных сайта с бесплатными курсами и ресурсами по геммологии
Рекомендуем


Лучшее

Важно знать!
7 дисциплин, которые стоит знать программисту
Что такое IT?
Если задать такой вопрос прохожим на улице, то чаще всего прозвучит ответ: «Что-то связанное с компьютерами», «Это программисты». Такое представление лишь отчасти верно и годится только...
Читать далее
7 критериев исторического сочинения егэ от фипи
7 популярных грантов для обучения за рубежом
7 причин стать диджеем
7 причин стать поваром
7 способов получить дополнительные баллы при поступлении в 2020 году
8 современных профессий, которые вы можете бесплатно освоить онлайн
Bga пайка с нуля
Bist
Brand manager job description: top duties and qualifications
Новое


Обсуждаемое

Важно знать!
Mba
Каковы мои шансы поступить на программу MBA?
В зависимости от того, где бизнес-школы устанавливают планку, в процессе отбора могут оцениваться различные аспекты опыта абитуриентов. Университеты ценят...
Читать далее
Mosmake
Mubint-my.sharepoint.com
№ 897-рм об утверждении положения о порядке назначения и выплаты дотаций остронуждающимся студентам вузов г.москвы
Pr-менеджер
Present tenses test
Smm-менеджер
Soft skills и hard skills: 20 ключевых навыков профессионального интернет-маркетолога
Studstat dgu ru
Top famous professional concept artists
Популярное


Актуальное
Важно знать!
Автореферат магистерской диссертации: как написать, структура, образец
Обзор и работа с литературой
Грамотная диссертация невозможна без тщательного выбора источников информации. Выбрав оптимальный и корректный метод работы с литературой, вам будет проще и быстрее в ней...
Читать далее
Обновления
 Без рубрики
Прокачай свой образовательный опыт: секреты эффективного онлайн-обучения!
Без рубрики
Прокачай свой образовательный опыт: секреты эффективного онлайн-обучения!
В современном мире онлайн-курсы стали неотъемлемой частью образовательного процесса, предоставляя уникальные...
 Аис «образование»
Вход в электронный журнал Владимирской области на официальном сайте школа.образование33.рф
При первичном...
 Антиплагиат вуз
Составляющие системы антиплагиат
Как и любая система, «антиплагиат ру» состоит из элементов. Основным...
 Актер
Актер
«Хочу стать актрисой!»: базовые навыки для освоения
Каков бы ни был талант и обаяние, без профессионального...
 Ангарский педагогический колледж
Педагогический колледж усолье сибирское
* На базе 9 классов , бюджетная основа , очная форма обучения...
 Ангарский политехнический техникум
Всероссийские проверочные работы в АТРиПТ
С 20 сентября 2021 г. по 7 октября 2021г. в техникуме пройдут...
 Акушерка, акушер
Особенности профессии
Эта профессия - призвание, ее выбирают только те люди, которые готовы посвятить...
 Архангельский колледж культуры и искусства
Контакты колледжа
Специальности колледжа
Библиотековедение Заочно, на базе...
 Апноэ и приступы удушья по ночам
Как проводится ПСГ?
Вечером вы придете к назначенному времени в Центр медицины сна (ориентируйтесь на...
 Архивы по годам: 2019
Обучение в училище олимпийского резерва
Училище олимпийского резерва имеют два отделения: олимпийского...
 Академическая разница при переводе: объемы, сроки и особенности перевода внутри вуза и в другое учебное заведение
Раздел 8. На что, прежде всего, следует обратить внимание?
При переводе, осуществляемом, внутри ВУЗа,...
 Аннотация
Пример
Так как проекты могут быть совершенно разными, аннотации к ним тоже могут весьма отличаться....
Нашли ошибку, неточность или опечатку в тексте?
Выделите её и нажмите Ctrl + Enter
Выделите её и нажмите Ctrl + Enter